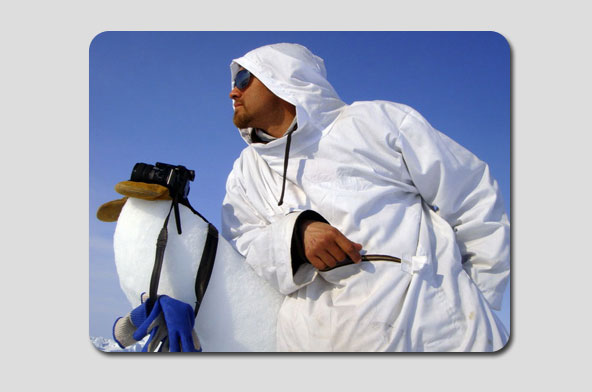
Rounding Corners on any Photograph
There is no right way or one way to accomplish this; There are many different ways and methods using more than one type of tool to create the look you desire. My purpose here is to show you how elegant your photos look when posted in this manner.
The Necessary Steps in the correct order
Open any photograph in photoshop.

The very first click you will make is to click and hold on the shapes tool on the toolbar.
That tool is located beneath the T for the Fonts tool.
When that menu opens, click on the 'rounded rectangle tool' now we are all set to begin.
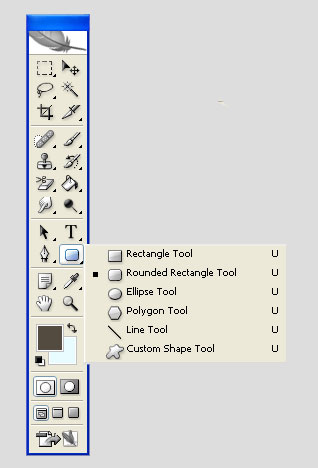
Notice: up top center of the program a small window; there is the amount in pixels that you can choose and enter for the radius corners. For the purposes of this tutorial, we will use 20 You may choose whichever number you desire.

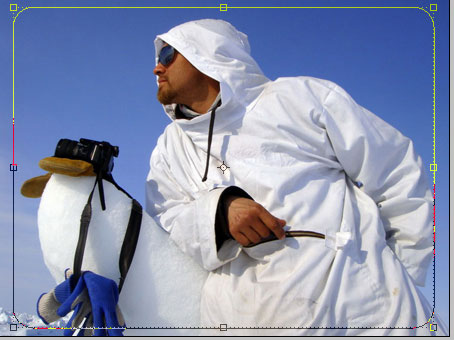
Draw a 'bounding box' on the photograph. For those that do not understand this term.
Place your mouse in the upper left corner of the photograph click & hold and more your mouse to the right as far as you want to crop the image. Do not let go of the mouse button. When you have reached the far right portion of the image - now begin to move your mouse down to the bottom portion of the photograph. When you have arrived at the proper location let go of the mouse button. You should see the 'foreground' color as a mask on top of the photograph.

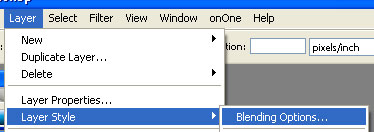
The next step: UP top on the main menu bar > Layer (click) Choose: Layer Style > Blending Options.
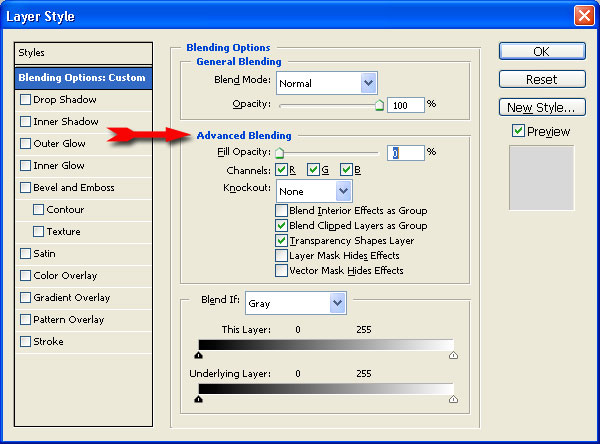
When that window opens make sure you turn down "Advanced Blending" to zero opacity. Close that window.
Look @ your photograph you can see the outline of your image with rounded corners.
Now look at your layers palette - See the shape icons above the background layer. Make sure the shape layer is selected and up top click on the word 'Paths'.

Shape 1 Vector Mask should be visible. Right beside that is a small arrow > click on that & choose Make Selection
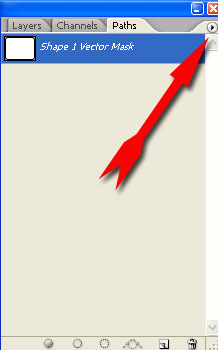
When that menu opens: Make sure the value = Zero
The next step is to go to the main menu bar and choose Edit > Copy Merged
Create a new layer, Then make sure that layer is selected and then go back up to the main menu and choose Edit again and click on Paste
Turn off the background and you are finished!
To Add Drop Shadow
Go back to the step Copy Merged
Create the new layer:
Now Open > New
When you open a new document NOTICE: the dimensions & enter 100 pixels or more to each Width & 100 or so to the Height.
Go back to your original image (not the new document you just opened)
Look At the Layers Palette. Choose the new transparent layer and Paste your new photo into that layer.
At the bottom of the Layers panel is the Blending Options
Open that and choose Drop shadow
Going Beyond the Basics
That new document you just opened. Now add the color of the page you want to post on and paint the background that color. Select the new layer and paste your image into there and add drop shadow
Here is the ultimate step in finesse to make your photos look very cool on a website with a colored background in the post section such as Ozzu has.
When you post in Ozzu - There are two different colors for backgrounds. Before I ever began this tutorial. First I copied those two colors by using the print screen key on your keyboard when I had a page open in Ozzu. I made a high-quality.*jpg of that page, and save it into a folder named backgrounds because I post on many forums and I want my photos to look as nice as possible.
That color is what you will use to match the photo & shadows to the background Layer & the page you are posting on.
Good luck and develop your newfound skill in making photos look very realistic when posting in a much more pleasing manner.
FINAL THOUGHTS
You can choose any shape such as a heart or some other custom shape. When you paste your image into that shape- you have control points that allow you to create the most amazing flowers with petals with the image displayed. Have fun and practice !!
This page was published on It was last revised on
