I recently came across a situation where I wanted to reduce the root volume size of an EC2 instance I had in place. It seems like a common request that people occasionally have, but every solution I tried did not work. Many of the solutions were dated or relied on a very specific process that may work for some situations. It became frustrating, so instead, I figured it out my own way, but I wanted to share this as a reference for others who are trying to solve this problem.
My goal was to find a generic solution that would work in a variety of situations consistently even as the years go by. Below you will see we are using XFS filesystem, but this should work with any type.
Here is a high-level look at the steps that will be involved:
- Take a snapshot of your current root volume for a backup in case things go wrong.
- Update FSTAB on the instance to not use UUID.
- Create a new instance using the original AMI at the volume size you want.
- Associate new instance volume with the pre-existing instance.
- Rsync files from the root volume to the new volume.
- Use the new smaller volume with your instance.
Now let's go through each step in more detail.
Take a Snapshot of your current root volume
Shut down your instance in EC2, and then create a snapshot of the root volume marked with / for the EC2 instance in question.
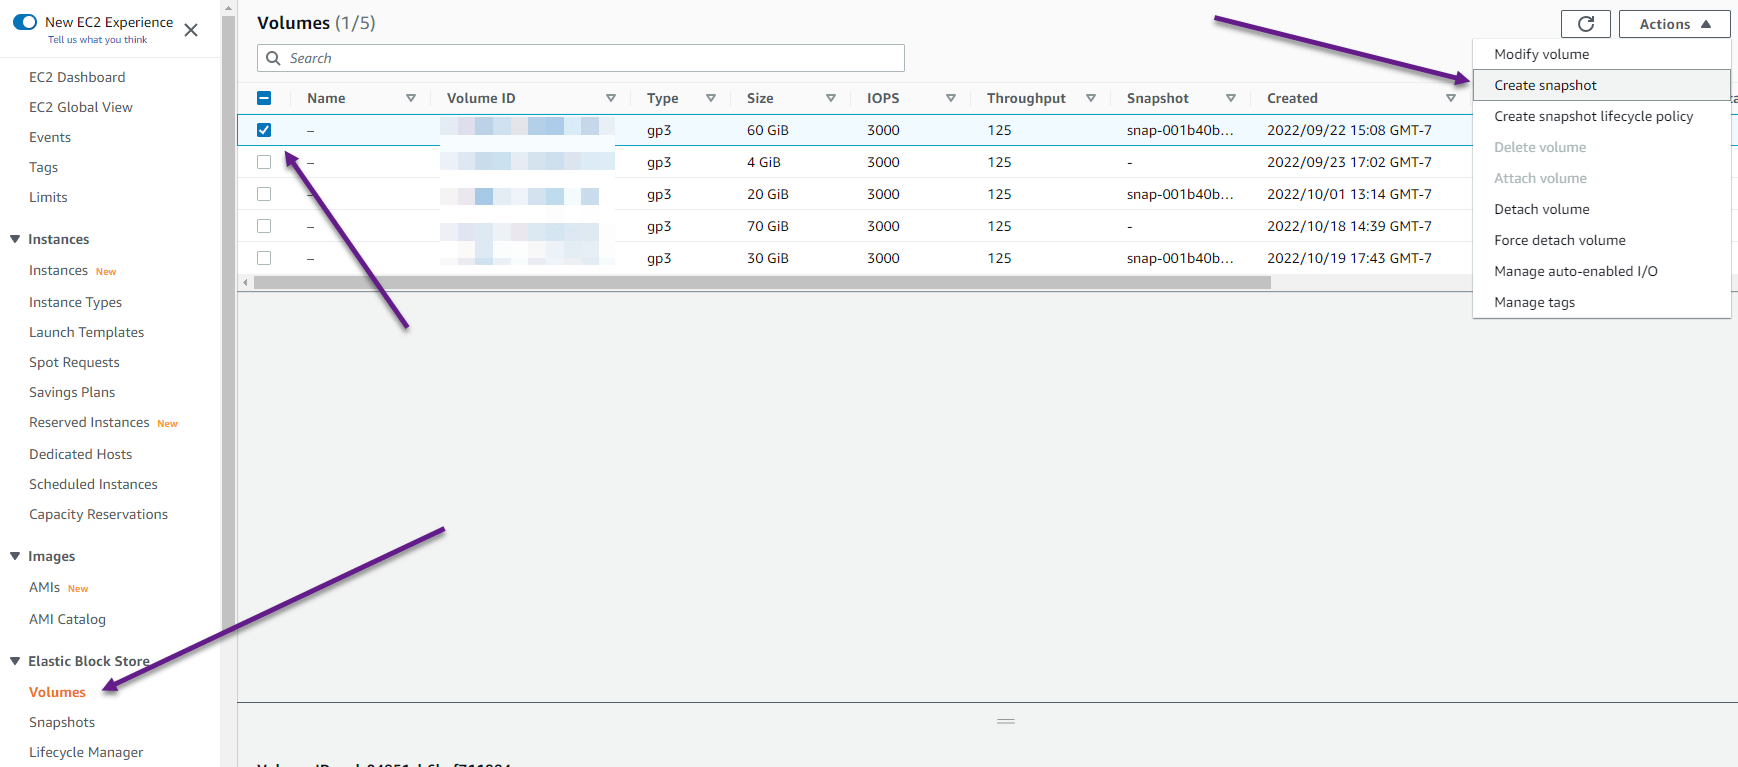
This will serve as a nice backup in case you screw things up attempting these changes. Otherwise, proceed with caution.
Update FSTAB on the instance to not use the UUID
As we go through the steps, one problem that was encountered is that when you essentially create a new instance using the original AMI you started with, the UUID of the root volume will be identical. This can cause a variety of problems, but the main issue I was having was that it would use the wrong volume if both the new and old volumes are attached to any instance. By updating FSTAB to not use UUIDs (at least temporarily), we can get around this problem. Here you can see the UUID in /etc/fstab that we are going to want to change to refer to by device id instead:

You can use nano, vi, or your favorite editor to make changes to that file. From the console you can find the device ID For the root partition / by typing df:
# df

Filesystem     1K-blocks     Used Available Use% Mounted on
devtmpfs         1843228        0   1843228   0% /dev
tmpfs            1879956        0   1879956   0% /dev/shm
tmpfs            1879956    72984   1806972   4% /run
tmpfs            1879956        0   1879956   0% /sys/fs/cgroup
/dev/nvme0n1p1  62903276 19720568  43182708  32% /
/dev/nvme1n1    73364480 54393696  18970784  75% /home
tmpfs             375988        0    375988   0% /run/user/1000
So you can see from this list the one that is mounted on / is /dev/nvme0n1p1. We will want to update /etc/fstab to use that instead of the UUID. The result will look something like this:

Once those changes are saved we are then ready to create our new instance.
Create a new instance using the original AMI
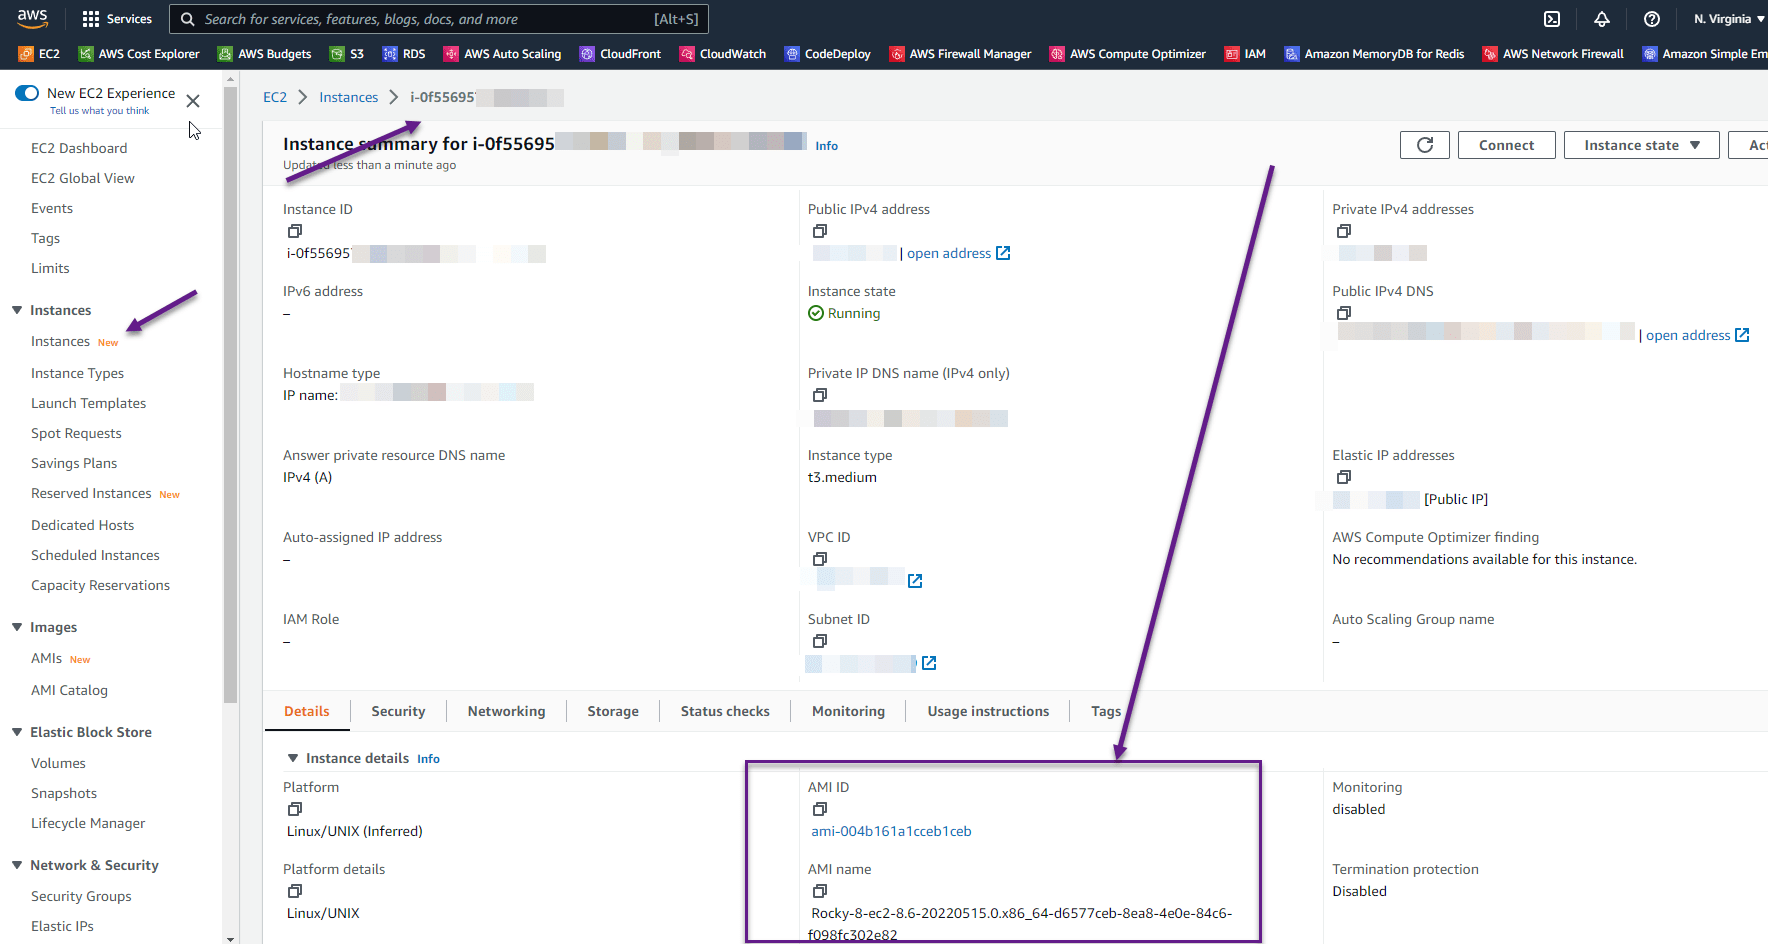
Let's spin up a new instance using the original AMI (Amazon Machine Image) that you used for your other instance. If you are unsure what that was, all you need to do is go to your instances in EC2, and click on the Instance ID for the instance in question. That instance summary page will show the AMI name as well as the AMI ID which will link to the AMI that was used:
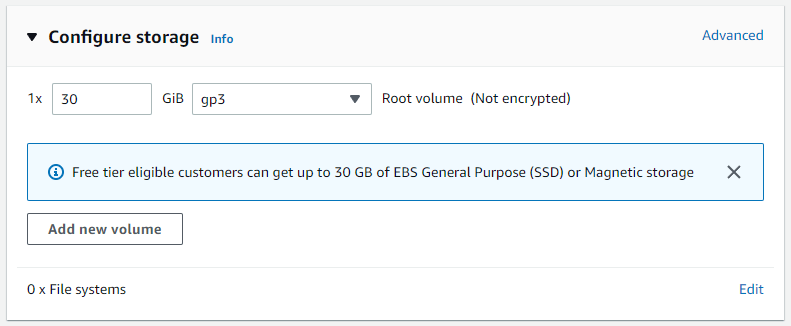
You can see in this case we are using Rocky Linux 8. Make sure you configure your storage using your new preferred size for the root volume. In my case, I am trying to change the root volume size from 60GB to 30GB. So for this new instance, I will configure the EBS storage volume to be 30GB gp3:
Once you get all of your settings like you want click on the button to Launch Instance. The entire purpose of this is to find a way to make it relatively easy to create a new volume at your preferred size that can boot up correctly. You are welcome to log in to your instance to make sure it works, I like to run yum update to bring everything up-to-date, but I don't think that matters. Now shut down the newly created instance:
# shutdown -h now
You can confirm once your instance has stopped on the instances page in EC2:

Now we are ready to associate this new volume to the original instance where we want to reduce the root volume.
Associate new instance volume with the pre-existing instance
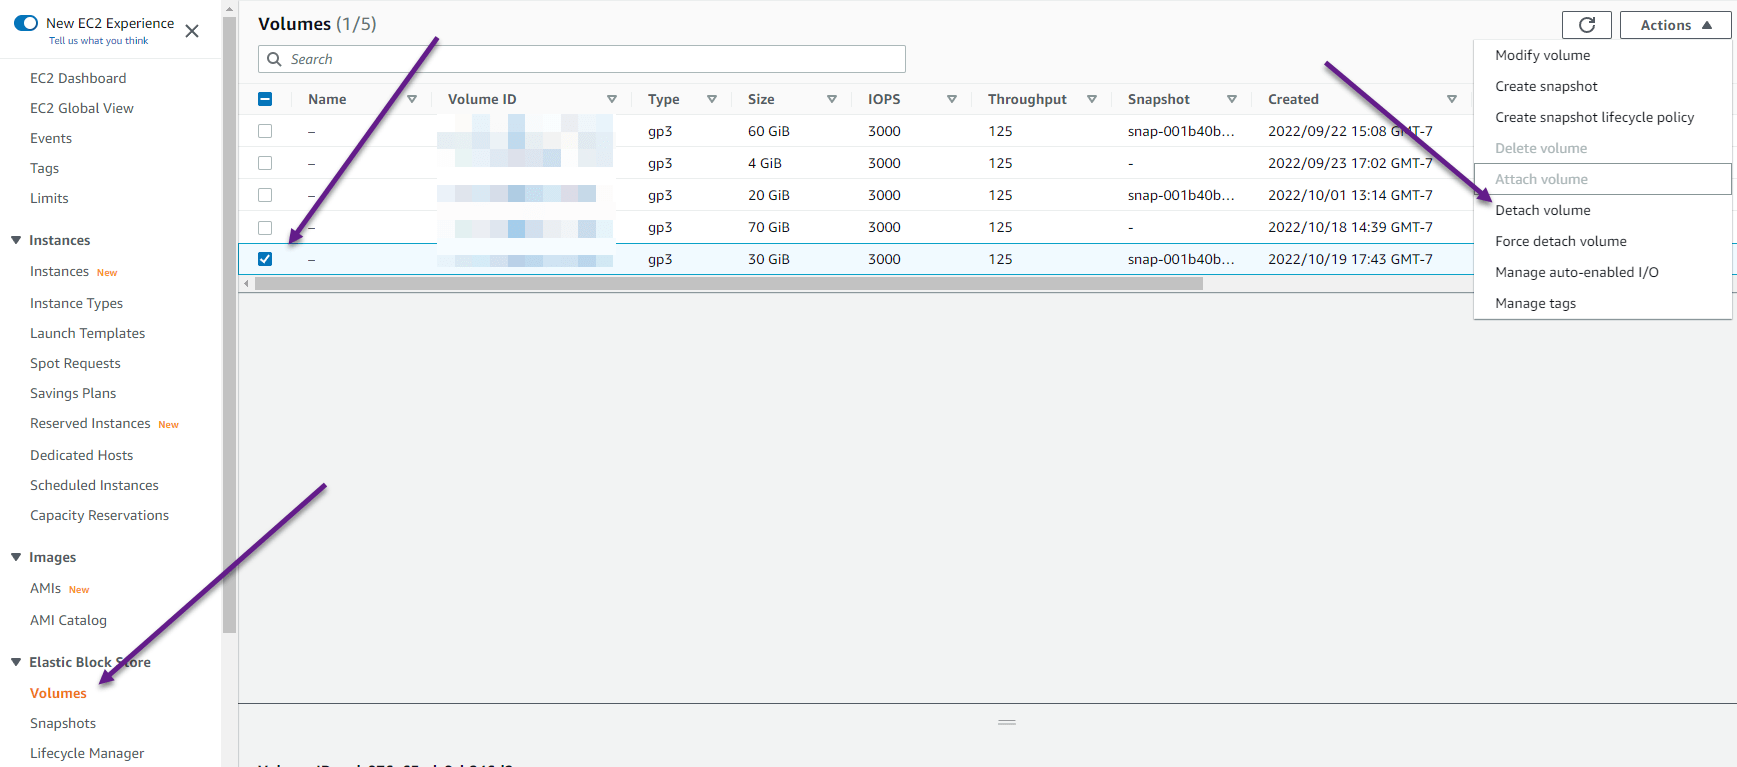
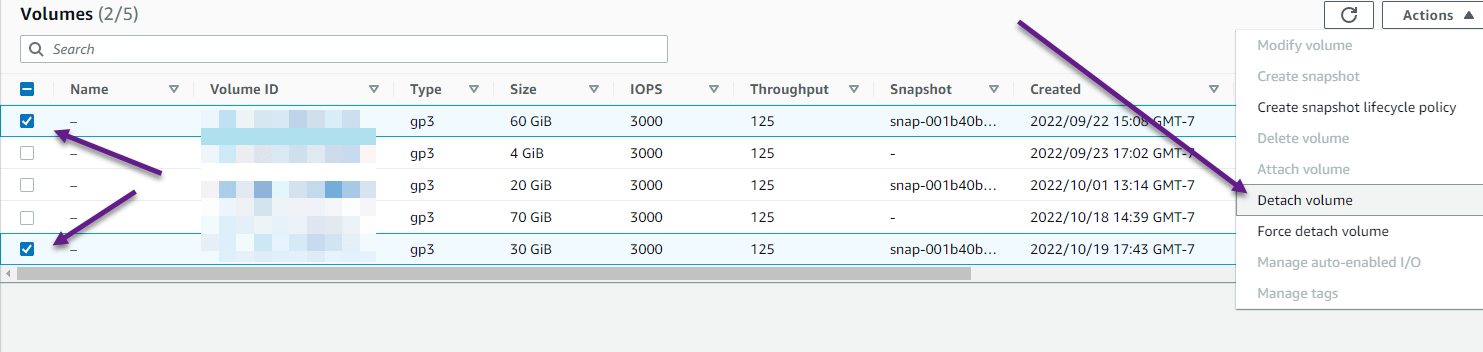
In EC2 go to the Elastic Block Store section and click on Volumes. Go through the different volumes and correctly identify which is associated with your instance. If you scroll to the right and look at the column labeled Attached Instances, it should provide you clues on which one you are after. Check the box next to the volume that was just created with the new instance, and then click Actions and go to Detach Volume:
Once that is detached then you will want to shut down our original instance, the one with the larger root volume. Once shutdown, navigate back to the Volumes section and find the volume you recently detached which will say Available:

Select that volume again, go to Actions and click on Attach Volume. Now we want to attach this recently created volume to the same instance with the larger root volume. You can just use all the defaults when doing this:
Once that is attached, go back to the instances section and restart your instance that now has the original root volume, as well as our newly created reduced size volume that will eventually be the new root volume.
Log in to your instance and from the console type:
# blkid
What you will notice is that because we essentially cloned a new root volume from the original AMI, you will have duplicate UUIDs listed, and this was the reason we had updated /etc/fstab earlier so that our machine would boot correctly when both volumes are attached. You will also notice that the device IDs that they are referred to are actually different:

With the device IDs being different, one being /dev/nvme0n1p1 and the other /dev/nvme2n1p1, we were able to rely on that instead of the duplicate UUIDs.
Just a note, at this point you can change the UUID on the newly attached volume with the following command:
xfs_admin -U generate /dev/nvme2n1p1
However, if you do that you will also need to update grub's configuration and rebuild it otherwise your machine will not boot. This is not a necessary step for this tutorial so I am not going to include that information. You can always change the UUID back to the original as well if you made this mistake:
xfs_admin -U a15f4a29-7fb8-4725-ba35-a9a555640aaf /dev/nvme2n1p1
Another note that you may find useful is that you cannot change the UUID of the actively-being-used root volume, the only way to change the UUID of that is to do something similar and attach that volume to another EC2 instance as the non-root volume so that you can mess with things. Just remember if you do that, and you are wanting to use it as the root volume, you will need to update grub accordingly.
In our case, we are going to proceed with the duplicate UUIDs since we are going to be removing the duplicate volume shortly. With our UUID already set to the original UUID, we also won't need to do anything with grub which simplifies this process.
Our last step is to simply bring all of the files from your old root volume to your new one using rsync.
Rsync files from the root volume to the new volume
To be able to rsync files from the old root volume to the newly created smaller EBS volume that will eventually replace this, we first need to mount the new volume. First, recall the device ID From above, if needed type blkid again to identify it.
# mkdir /mnt
# mount -t xfs -o nouuid /dev/nvme2n1p1 /mnt
With this mount command, we have to pass in -o nouuid because as you recall we have a duplicate UUID. Without using that argument so that we ignore UUIDs, it would result in an error like the following:
mount: /mnt: wrong fs type, bad option, bad superblock on /dev/nvme2n1p1, missing codepage or helper program, or other error.
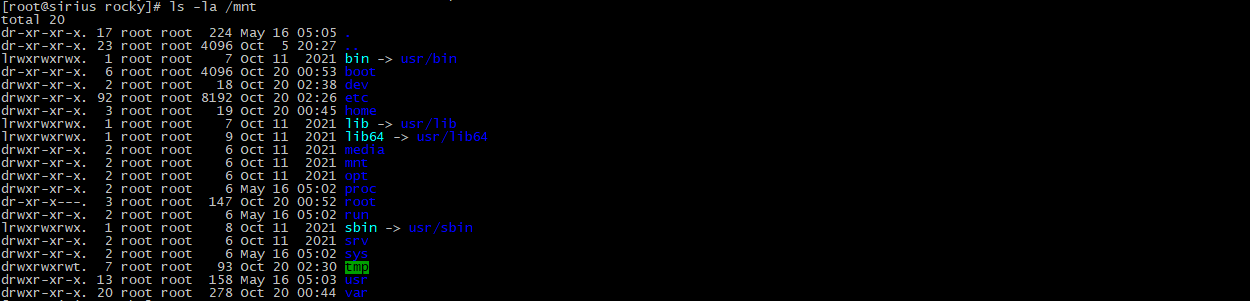
So the solution is to just make sure that we temporarily ignore UUIDs by using the nouuid argument. Now we can access this new volume at /mnt which you can confirm using the ls -la command:
Now we are ready to rsync. Type the following to copy everything from the live root partition to our new root volume:
# rsync -aAXv --exclude={"/home/","/home","/dev/","/proc/","/sys/","/tmp/","/run/","/mnt/","/media/*","/lost+found","/","/mnt"} / /mnt
You can update the exclude as needed, but just a word of caution that I had to find out the hard way that you need to ensure that no spaces exist in the exclude text between commas. This will copy all the files from / to /mnt excluding the ones you want and the special categories. This will take a while, so sit back and relax, or find something else to work on while this happens.
Once this is complete, we are ready to boot with the new smaller root volume.
Use the new smaller volume with your instance
First shutdown your instance again:
# shutdown -h now
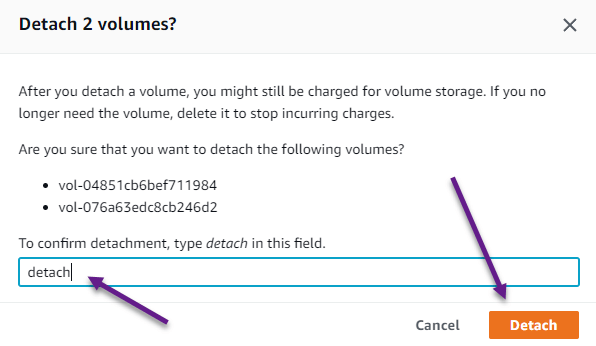
Then as we have done before in this tutorial, go ahead and detach the new volume, as well as the existing old root volume from the instance:
Confirm that you really do want to detach these:
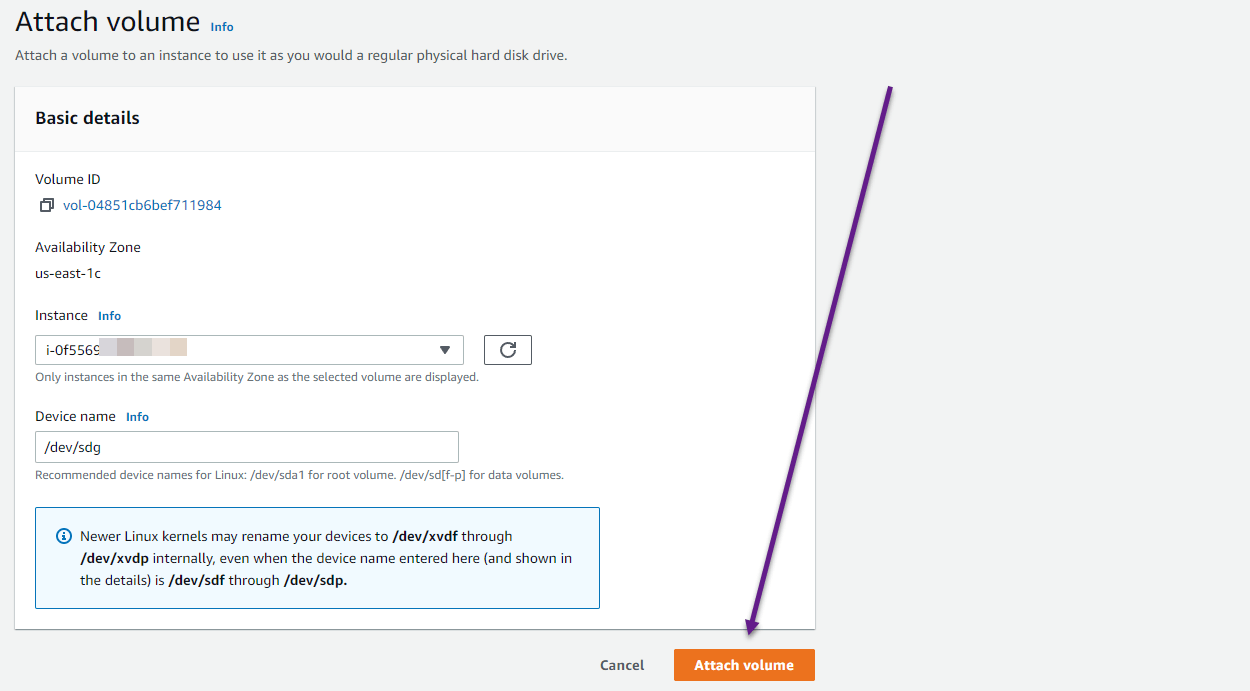
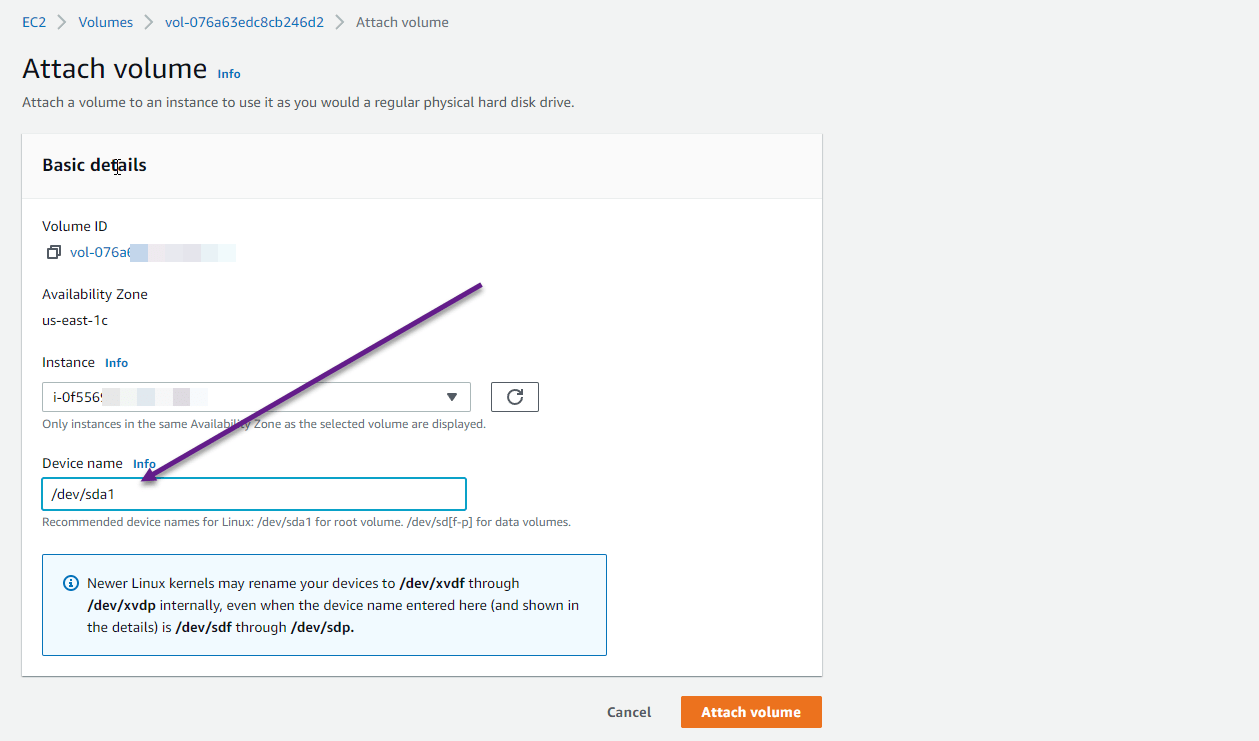
Now that both are detached, we are just going to attach the new smaller volume as we are ready to boot with it. The most critical step when attaching the volume is that you will need to ensure that the device name is as recommended below the text box for root volumes which is: /dev/sda1:
Now the only thing we have left to do is to go back to instances and start your instance back up! Once I log in I can confirm with the df -h command that the total disk space for the root partition is 30GB instead of 60GB:

Final Thoughts
The solution I provided above tries to avoid all of the pitfalls and technicalities I found in other solutions that just made things complicated, risky, or scary to perform. I hope many of you will find this useful.
The solution above will also work for non-root volumes, for example, this might be a common scenario for reducing the size of the /home volume which is a much more simple process. In this case, you would simply:
- Create a new volume at your desired size
- Attach the new volume to the instance
- Mount and rsync the files over
You can skip the process of creating a new instance using the original AMI, and you can skip the part of using the device id instead of the UUID in /etc/fstab. However, once you have everything transferred over, you will want to make sure you identify the new volume's UUID using blkid, and then update your FSTAB accordingly so that it's mounted when you boot up. You could then shutdown the instance, detach the larger volume you no longer want, and then restart the instance and confirm everything is correct.
This page was published on It was last revised on


