This is a tutorial for individuals who have no experience with Adobe Photoshop. This tutorial will help you to become familiarized with the user interface and some essential precepts you'll need to know to get started.
Introduction
Adobe Photoshop has been a tool in web developers' toolboxes for a long time. In fact, one could say that it is the de facto standard for working with images.
While there is alternative software to Photoshop, there really isn't an alternative to knowing how to use Photoshop. It will be a requirement of almost any employment situation that deals with graphics on a professional level.
For this tutorial, we'll be using Adobe Photoshop for figures and references. However, all the concepts we'll be dealing with here will exist in previous versions.
If you do not have Adobe Photoshop, you can download here.
Two Types of Images
Where computer-generated graphics are concerned, there are two types of images: raster images and vector images.
Raster Images
Sometimes referred to as bitmaps or bitmapped images, raster images are based on pixels. The screen you're looking at right now is composed of a grid of many tiny dots. Each of these dots is a single pixel. Photoshop was originally developed for dealing with this type of image.
If I was to describe the letter "G" in pixels, it might look something like Figure 1.

Vector Images
The other type of images are vector images. Vector images are created through a system of points (vertices, anchors, corners) and lines (paths). Vector-based images help us create smooth organic curves. They have many distinct advantages over raster images.
Photoshop has the capability to create and use vector images. Vector images will be explained, in detail, in a later tutorial.
The Application Interface
Let's launch Adobe Photoshop. This can be accomplished in several different ways including a desktop icon or quick launch bar. If we're using a Windows operating system, it can be launched from the "Start" menu (e.g. Start/All Programs/Adobe/Photoshop).
When Photoshop is opened, the interface will look something like Figure 2.
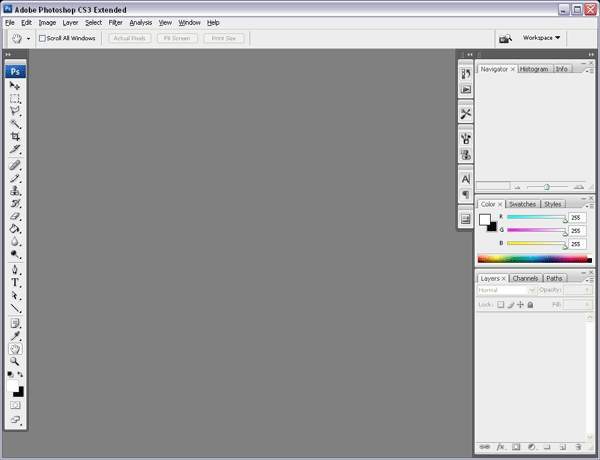
Let's take a moment to observe the different components that make up this interface.
Across the top of the program, below the title bar is the text-menu. The text-menu has the words, "File", "Edit", "Image", "Layer", "Select", etc. This type of menu, in this location, is probably familiar to us as it is common to the majority of programs on our computers (Figure 3).
Immediately below the text-menu, is the context-menu. The items in this menu will change to reflect the options associated with the tool being used. (Figure 3)

Along the left side of the interface, we find the Tools palette (Figure 4). If this is not present, choose Window from the text menu and then Tools. This toolbox is where we will go when we want to _select _and create.
We will study the tools in more detail in a different tutorial.

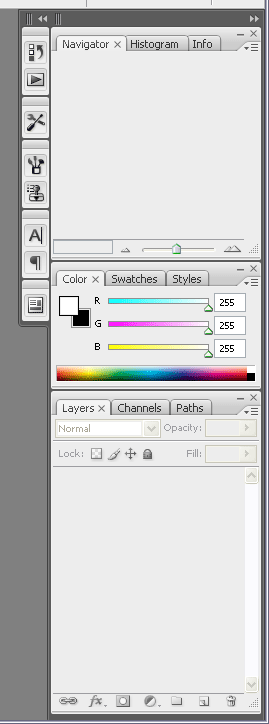
On the right side of our interface, we have an area for Palettes (Figure 5). Palettes are a series of smaller windows. Each palette, or window, serves a specific function. In general, the palette area is where we go when we want to manipulate.
Individual palettes will be examined in detail over the entire tutorial series.
Photoshop Documents, Viewing Modes, and Files
Let's start a blank Photoshop document by going to File in the text menu and choosing New. The resulting dialog window will look something like Figure 6.1.
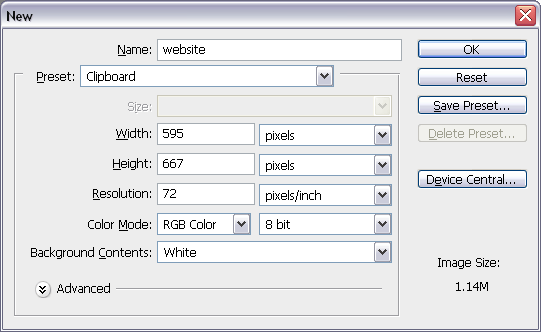
The first item is a field where we can establish a Name for this file. Let's type in the name that we'd like to have for this file, for instance, "website". If we skip this field, the document will be named by Photoshop as "Untitled". This is fine, the file can be named later when it's saved.
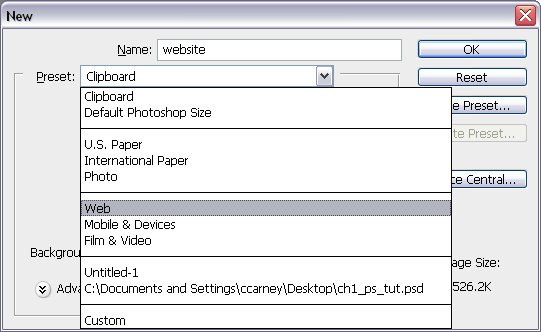
Next, is a drop-down menu labeled Preset (Figure 6.2) that allows us to choose from some previously defined document types. For now, let's choose "Web". When we do this, many of the options that follow are changed for us. We will explore this interface in more detail in later sections of this series.
Let's accept these default values by choosing the OK button positioned in the top right of this dialog window (Figure 6.1). When we do that, a new window will open in our workspace (Figure 7).
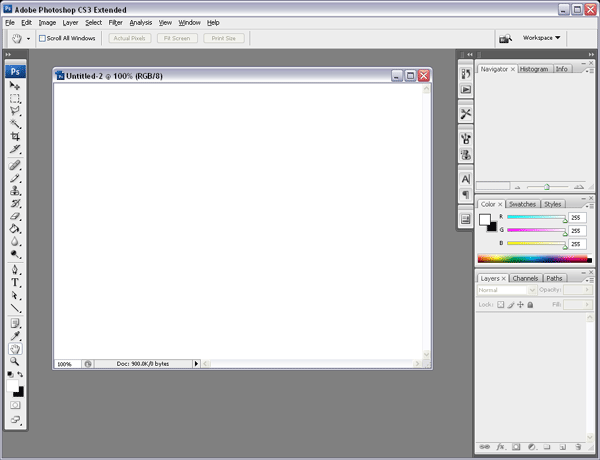
Controlling the Viewing Mode with keyboard shortcuts
If our interface doesn't look like the image above, we may be in the wrong viewing mode. Photoshop gives us a convenient way of moving between viewing modes while we work on images.
- We can toggle the interface palettes and context menu on and off by tapping the TAB key on our keyboard.
- We can toggle between window states by tapping the F key on our keyboard.
Let's take a moment to experiment with these keyboard shortcuts and observe the different views.
Now, from the text menu let's choose File, then Save. The save dialog appears on the screen.
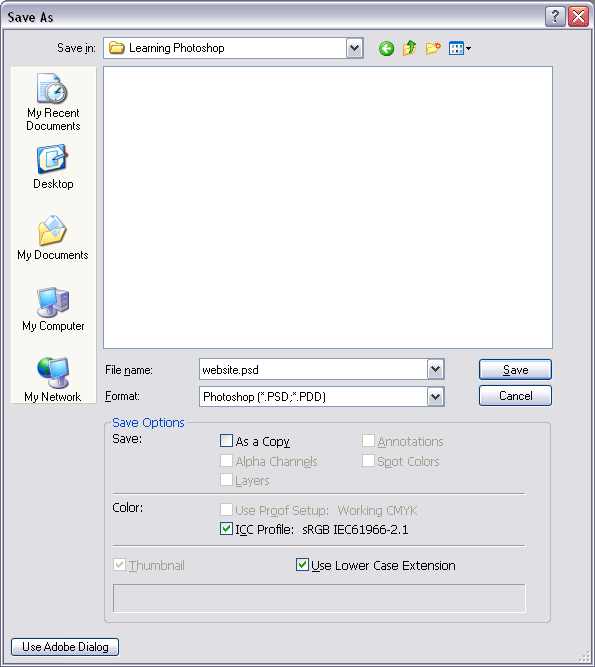
The save dialog window should feel familiar to us as it is common in most of the programs on our computer. Here we can name our file if we haven't already. Then we can choose a location for our file and save the work we've done (Figure 8).
The file type we use to save our work is a Photoshop Document. The extension of the file name is .psd. So, if we named our file "website", the file name of the saved file would be website.psd.
Conclusion
In this tutorial, we learned some fundamentals for working with the program including the parts of the user interface and file management.
Related: Tools Palette for Absolute Beginners
This page was published on It was last revised on