This is a tutorial for individuals who have little to no experience with Adobe Photoshop. This tutorial will help you to become familiarized with the Tools palette. Please first read the tutorial on Adobe Photoshop's User Interface if you do not already have a basic understanding.
Introduction
Hopefully, the other tutorial gave us a good understanding of the user interface. Now that we understand our working environment better we can take a closer look at some of our tools. The Tools palette is located along the left side of the user interface (Figure 1), by default.
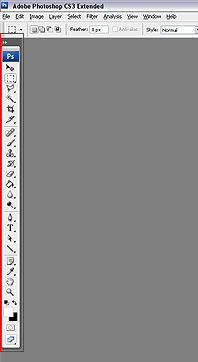
If we take a moment to observe the Tools palette, we can see some features that are common amongst palette windows.
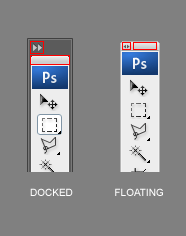
At the top, we'll see a control to toggle between the display modes (Figure 2). Click on this a couple of times to see the difference between the two views. You can leave it on the one you're most comfortable with.
Just below is a small gray bar. Click and drag this to reposition the Tools on your screen. If you drag this, or any palette, to an edge of the workspace, a faint blue/gray background will appear to indicate that the palette can be docked by dropping it there (Figure 3).

Color Swatches and the Color Picker and Flyouts
Let's jump to the bottom of the Tools palette and look at the area with the black and white squares (Figure 4). There are four different controls in this little area that we'll consider.
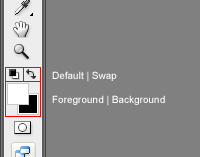
- Foreground - The foreground color swatch represents the primary color that we're currently working with.
- Background - The background color swatch represents the secondary color that we're currently working with.
- Default - Clicking this control will reset the Fore and Background colors to their defaults - black in the foreground and white in the background.
- Swap - Clicking this control will send the foreground color to the background and vice versa.
Let's single-click on the foreground color swatch. When we do, we evoke the Color Picker dialog window (Figure 5). Here we can pick, or formulate colors.
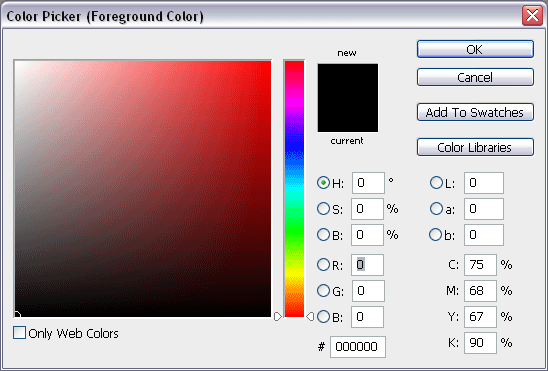
- Picker Controls - In this area of the interface, you can define colors visually. Choose a Hue using the vertical rainbow, then define a Saturation and Brightness in the large window on the left. If the "only Web Colors" checkbox is checked, only web-safe colors will be displayed in these controls.
- Formulation controls - These controls require an in-depth knowledge of how colors are formulated. It allows for specific design colors based on five common methods (HSB, Lab, RGB, CMYK, and Hexidecimal). The radio buttons beside some values allow us to alter how the functions of the visual picker are oriented. For now, let's leave those as they are.
- Warning Indicators - These indicate that a color is out of range or not within a color palette. An explanation will appear in a tooltip if you allow our cursor to hover over the icon for a moment. A correction for the problem is also suggested.
- OK and Cancel/Reset - Obviously enough, if we click OK we accept the changes we've made to the color swatch and, likewise, if we Cancel, we give up those changes and close the dialog. If we hold down the ALT key on our keyboards, the Cancel button becomes Reset. Clicking Reset will cause the picker to revert to its initial color without closing the dialog window.
You should take a moment to explore this window and play with some of the controls. When you're finished, close this window.
Before we move on, let's create a blank document as we did in the tutorial about Adobe Photoshop's User Interface.
The Tools
Let's turn back to the Tools palette now. Between the palette controls at the top and the Color Swatch area at the bottom, we see about 22 icons that represent the crux of the "tools". You can probably guess the function of some tools just by looking at the icons.
One thing we'll want to notice is that some icons have a small black arrow in their bottom right-hand corners. This indicates a Flyout menu. To reveal this menu, click and hold on a top-level button. When the menu appears, release the mouse.
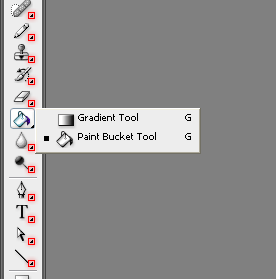
Let's do this with the Paint Bucket and/or Gradient Tools that we see in Figure 6.
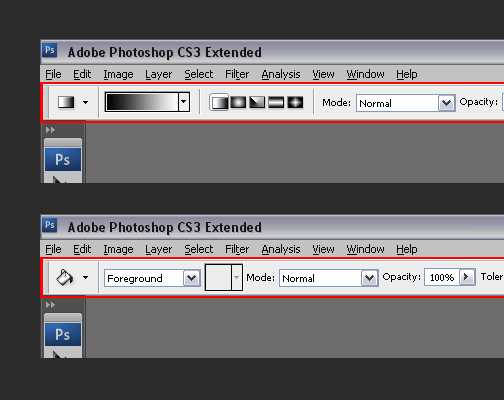
Toggle between these two tools and while you do observe the context menu or Options menu. The options change to reflect the tool that is currently selected (Figure 7). This is an important notion as we move forward.
Let's select the Paint Bucket tool.
Draw-ring Like a 6-Year-Old
The paint bucket is a "fill tool". It fills large solid areas at once. Let's see it in action.
First, make sure that the background color in your document (it should be white) and the color selected in your Foreground swatch are different. Next, select the Paint Bucket Tool and click anywhere in the document. The result is that the document is filled with the color from the Foreground swatch.
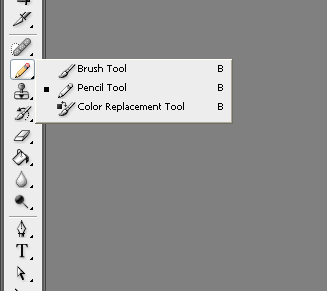
Now, let's look at the Pencil and Brush tools (Figure 8).
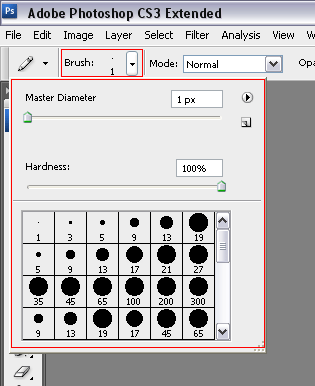
Let's choose the Pencil tool and then look at the context menu. Next to the word "Brush:" we see a dot above a numeral and a downward arrow (Figure 9). Click on the arrow. This will evoke a dialog for brush sizes. Here you can set a size and shape for your pencil tool. Choose any of the brushes below by double-clicking the brushes icon.
With a different color than the background of the document, begin to draw with the pencil tool.
Now we'll choose the Brush tool and, as we did before, set a brush size in the context-menu. Take a moment to experiment with this tool. The differences between the Pencil and Brush tools should be apparent.
A SELECT Few Pixels...
An important notion in almost all graphics programs is selection. The ability to isolate and select areas or objects is essential. Let's look at some selection tools. They are located at the top of the Tool palette (Figure 10).
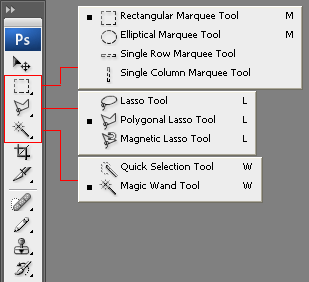
Choose the Rectangular Marquee tool. Click and hold anywhere in our document. Drag the cursor down and to the right.
Release the mouse button. The result is that we've defined a selection area. Currently, the only part of our document that we can affect is inside the selection area.
With a selection area defined, go back to the three tools we looked at earlier and see how they all function with these new confines. Make sure you define new colors.
Let's go back to the Rectangular Marquee tool and define a new selection area as we did before. This time, however, as you click and drag hold the Shift key on your keyboard. The result is that the selection area is constrained to square dimensions. This is very handy and will be true with many of the tools we'll see in the future.
Conclusion
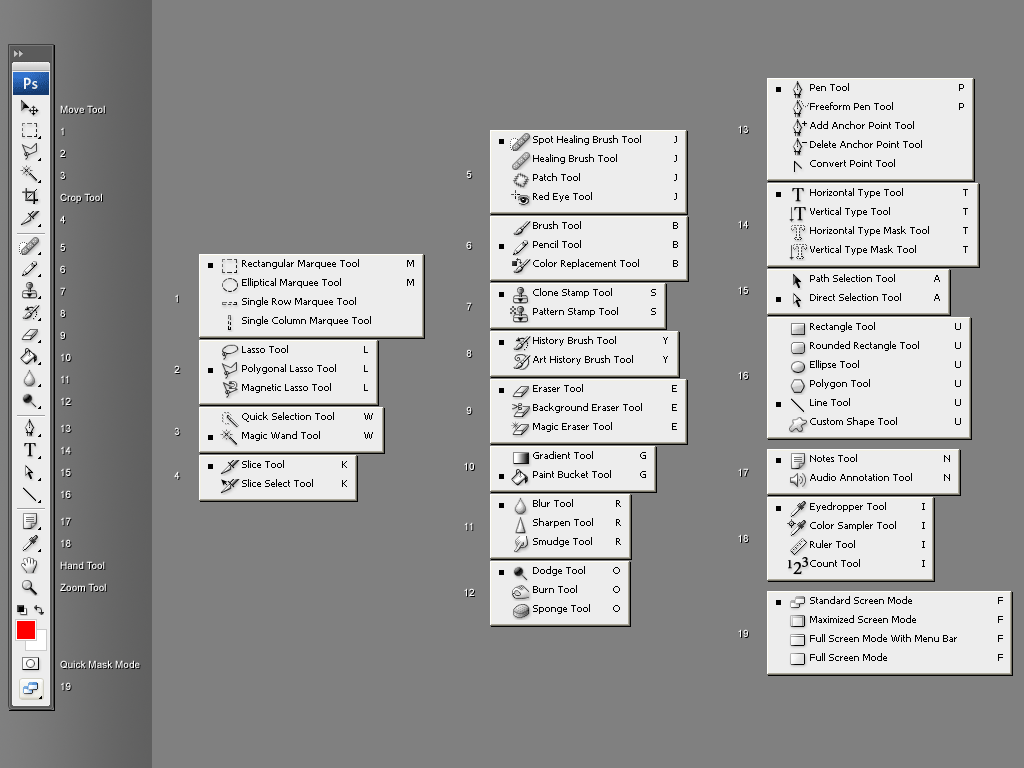
In this tutorial, we examined some basic functions of the Tools palette. Below is a graphic of all the tools available (Figure 11). If you're interested in seeing how a tool functions, I suggest you look through the Help files in the text-menu.
This page was published on It was last revised on
-
0
Thank you. I had planned to continue with a 12-chapter series, but unfortunately, I upgraded to CS4. The new interface is a bit different. Now that I think about it, I could go back and update these. Hmmm... Thanks again!
— digitalMedia
-
0
Really appreciate the tutorial you had done because I am new and it's help a lot! I hope you can finish your twelve chapters!
— skyz89
add a comment