Introduction
You've seen expand/collapse blocks just about everywhere on the Internet! Ever wanted to know how to make your own? You'll be surprised at how simple it is - just a few lines of JavaScript will let you toggle any block of content on your webpage.
The rest of this tutorial assumes a basic knowledge of HTML and JavaScript.
A simple toggle block
Let us start with a simple block of text (it could as well contain images and any other content) that we wish to make toggle-able:
<div id="content">
Lorem ipsum dolor sit amet, consectetuer adipiscing elit. Nunc fermentum.
</div>
Next, we add a link that toggles the block when clicked:
<a href="#" onclick="toggle('content')">Toggle</a>
All that is left is the actual toggle function. The toggle function itself is quite simple: it takes the ID of the element to toggle and uses the CSS display property to show/hide it. By default, the display property is blank. (unless specified otherwise in the CSS) To hide an element, you just set display to 'none'. The code goes like this:
<script type="text/javascript">

function toggle(id) {
  var e = document.getElementById(id);

  if (e.style.display == '')
    e.style.display = 'none';
  else
    e.style.display = '';
}

</script>
Put the above 3 code fragments together and you've got a working expand/collapse block.
In the above example, the block is initially visible. To have the block hidden by default, simply modify the first line as follows:
<div id="content" style="display:none">
A small addition
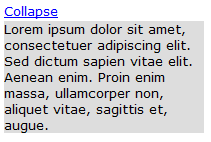
With the addition of a couple more lines, you can also toggle the link text between 'Expand' and 'Collapse' when the user clicks on it. To do this, we pass in another parameter to toggle: a reference to the link that activates the toggle effect.
<a href="#" onclick="toggle2('content', this)">Collapse</a>
<script type="text/javascript">

function toggle2(id, link) {
  var e = document.getElementById(id);

  if (e.style.display == '') {
    e.style.display = 'none';
    link.innerHTML = 'Expand';
  } else {
    e.style.display = '';
    link.innerHTML = 'Collapse';
  }
}

</script>
Building tree structures
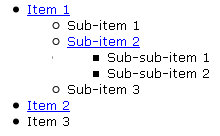
By nesting one block within another, you can create tree-like structures where each individual node can be expanded and collapsed. The code for this uses the same toggle function defined above, except that multiple blocks are nested within each other:
<ul>
  <li>
    <a href="#" onclick="toggle('node1')">Item 1</a>
    <ul id="node1" style="display:none">
      <li>Sub-item 1</li>
      <li>
        <a href="#" onclick="toggle('node2')">Sub-item 2</a>
        <ul id="node2" style="display:none">
          <li>Sub-sub-item 1</li>
          <li>Sub-sub-item 2</li>
        </ul>
      </li>
      <li>Sub-item 3</li>
    </ul>
  </li>
  <li>
    <a href="#" onclick="toggle('node3')">Item 2</a>
    <ul id="node3" style="display:none">
      <li>Sub-item 1</li>
      <li>Sub-item 2</li>
    </ul>
  </li>
  <li>Item 3</li>
</ul>
Conclusion
Well, that's about it! It's that simple to create an expand/collapse block. And you can use as many of these blocks as you want on a single page.
You can copy the sample code for this tutorial below. The attachment contains a single HTML file that shows the expand/collapse block and navigation tree in action.
toggle.html:
<html>

<head>

<title>JavaScript Expand/Collapse Sample</title>

<style type="text/css">
body { font:10pt Verdana; }
a { color:blue; }
#content { background-color:#dddddd; width:200px; margin-top:2px; }
</style>

</head>

<body>

<script type="text/javascript">

function toggle(id) {
  var e = document.getElementById(id);

  if (e.style.display == '')
    e.style.display = 'none';
  else
    e.style.display = '';
}

function toggle2(id, link) {
  var e = document.getElementById(id);

  if (e.style.display == '') {
    e.style.display = 'none';
    link.innerHTML = 'Expand';
  } else {
    e.style.display = '';
    link.innerHTML = 'Collapse';
  }
}

</script>

<h3>Simple expand/collapse block</h3>

<a href="#" onclick="toggle2('content', this)">Collapse</a>

<div id="content">
Lorem ipsum dolor sit amet, consectetuer adipiscing elit. Nunc fermentum.
</div>

<h3>Nested expand/collapse blocks in tree format</h3>

<ul>
  <li>
    <a href="#" onclick="toggle('node1')">Item 1</a>
    <ul id="node1" style="display:none">
      <li>Sub-item 1</li>
      <li>
        <a href="#" onclick="toggle('node2')">Sub-item 2</a>
        <ul id="node2" style="display:none">
          <li>Sub-sub-item 1</li>
          <li>Sub-sub-item 2</li>
        </ul>
      </li>
      <li>Sub-item 3</li>
    </ul>
  </li>
  <li>
    <a href="#" onclick="toggle('node3')">Item 2</a>
    <ul id="node3" style="display:none">
      <li>Sub-item 1</li>
      <li>Sub-item 2</li>
    </ul>
  </li>
  <li>Item 3</li>
</ul>

</body>

</html>
This page was published on It was last revised on


